Choosing the best PCR mixture for your lab is not simply a matter of buying the newest kit. A pcr mixture must suit your target, sample type, equipment, and workflow. A formulation that performs well with clean DNA may struggle with inhibitor-rich samples or a difficult template. Small differences matter: polymerase choice, buffer chemistry, magnesium concentration, and included additives can affect amplification, specificity, and consistency. That sounds simple. It isn’t always.
This guide explains how to compare mixtures using practical criteria, not product claims alone. It considers ready-to-use master mixes, hot-start formulations, and options that allow more control over reaction components. You will also see how to assess compatibility with your cycler, amplicon length, and downstream analysis. Results from a few test reactions can help, but they do not prove a mixture will work for every sample. Keep notes on lot numbers, cycling conditions, and controls; these details make comparisons more reliable. Cost per reaction matters, too, yet a cheaper tube can become expensive if it increases repeat runs. There is no universal winner. Even experienced teams may need to revise an initial choice after seeing their own data. The aim is a defensible, repeatable selection for your lab—not a perfect answer on paper.
How to Choose the Best PCR Mixture for Your Lab?
Understand the Components and Formats of PCR Mixtures
A PCR mixture combines a thermostable DNA polymerase, nucleotides, magnesium ions, buffer, and water. Each component affects amplification. Magnesium supports enzyme activity, while excess magnesium can increase nonspecific products. Some mixes include primers and fluorescent dyes; others leave these choices to the user. Hot-start polymerases help limit unwanted reactions during setup. The MIQE guidelines emphasize reporting assay reagents and conditions so results can be interpreted and repeated. Details matter.
Formats shape daily workflow. A master mix usually contains the polymerase, buffer, and nucleotides, reducing repeated pipetting across a plate. A ready-to-use mix may also include tracking dye or a fluorescent reporter, depending on the assay. Grand View Research estimated the global PCR market at about USD 10.2 billion in 2023, reflecting broad use across research and diagnostics. That market figure does not identify the best formulation for any specific assay. A mix that performs well with a short target may need retesting with a GC-rich template.
Tips: Match the format to your assay and equipment. Check whether the mix supports endpoint or real-time PCR, then test a small dilution series with positive and no-template controls. Keep the same DNA input and cycling settings when comparing formulations. One detail is easy to miss: changing mixes may shift the optimal magnesium balance, even when the protocol looks unchanged.
How to Choose the Best PCR Mixture for Your Lab?
Match the Mixture Chemistry to Your Assay and Sample
Start with the sample, not the product label. A clean plasmid and a crude tissue extract place very different demands on a PCR mixture. Salts, heme, and leftover extraction reagents can suppress amplification. For inhibitor-prone samples, consider a formulation designed to tolerate inhibitors, then test it against your current mix using the same DNA input. Watch the amplification curves. A delayed curve or poor replicate agreement is useful evidence, not just a failed run.
Match chemistry to the assay, too. Dye-based qPCR needs a mix compatible with the chosen fluorescent dye; probe assays need suitable probe chemistry. High-GC targets may benefit from additives that help separate tightly paired strands. For one-step RT-qPCR, check that reverse transcription and amplification conditions work together. Small details matter. In my view, this is where selection gets less tidy: a mix that works well on one target may disappoint on another. The MIQE guidelines include an 85-item checklist for reporting quantitative PCR experiments, underscoring how many conditions affect results (Bustin et al., Clinical Chemistry, 2009). Compare candidate mixes with a no-template control, an extraction blank, and replicate samples. Record the sample type, target, and cycling conditions. Don’t change several variables at once; otherwise, it becomes hard to tell what helped.
A PCR mixture should fit the target, not just the instrument. A short, low-GC amplicon may amplify well with a standard formulation, while a GC-rich region can stall or produce faint bands. For longer targets, check whether the mix supports reliable extension across the full product length. High-fidelity polymerase matters when sequence accuracy is important, but it may not be necessary for every screening assay. Small details matter. Primer design and template quality can affect results as much as the mixture itself.
Reaction conditions change the comparison. Crude samples may carry inhibitors, so test a mix rated for inhibitor tolerance rather than simply increasing the template volume. For real-time PCR, confirm that the formulation suits the detection chemistry, whether dye-based or probe-based. Run a no-template control and a positive control, then compare amplification consistency, specificity, and yield across replicates. A sharp band is useful, but it does not prove the product is correct. It is tempting to blame a weak result on the mix; that assumption can be wrong. Change one factor at a time, such as magnesium concentration or annealing temperature, and record the conditions. Some targets remain stubborn, even after careful optimization.
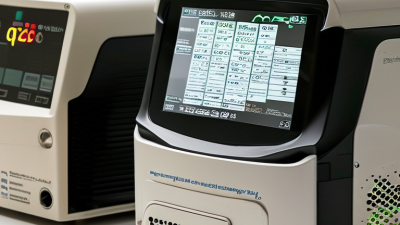
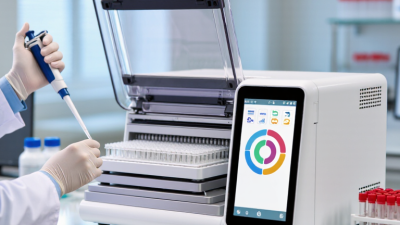
A PCR mixture should fit the instrument and the way your lab runs samples. Check the required reaction volume and whether the cycler accepts your tubes, strip tubes, or plate format. A mismatch can affect sealing, heating, or fluorescence readings. Small details matter.
For probe-based assays, confirm that the mixture supports the required fluorescent dyes and any passive reference signal. For dye-based assays, check whether the chemistry suits your melt-curve workflow. Also compare the mixture’s recommended cycling conditions with your instrument’s ramp rates and temperature control. Do not assume that a familiar protocol transfers unchanged. I still find reaction volume easy to overlook when moving between formats.
Look at the workflow, too. A ready-to-use mix may reduce pipetting steps, while a more adjustable formulation can help when optimizing magnesium concentration or primer conditions. Check whether the mix includes a hot-start enzyme if reactions are assembled at room temperature. Then test it with your own primers, controls, and sample types before changing routine runs. Keep the comparison fair: use the same template amount and cycling program, and record amplification curves or product quality. One trial is rarely enough. Some labs may need a second check.
A PCR mixture can look excellent on paper and still struggle with your sample matrix. Validate it with pilot reactions before committing a full batch. The MIQE guidelines recommend reporting amplification efficiency and standard-curve performance; a practical target is 90–110% efficiency, with an R² of at least 0.99 (Bustin et al., Clinical Chemistry, 2009). These figures are useful benchmarks, not guarantees. A clean plasmid template may behave differently from a low-yield tissue extract.
Run a small dilution series with the same primers, template, and cycling conditions planned for routine work. Include a no-template control, a known positive, and an extraction control where relevant. Test replicates across the expected concentration range. Watch the amplification curves, not only the final readout: late, inconsistent signal can expose inhibition or poor reproducibility. Keep a simple record of lot, reaction volume, threshold settings, and replicate variation. It is easy to overlook a pipetting difference.
Pilot results may disappoint. That is useful information. If the positive control fails, check setup and reagents before changing several conditions at once. If only sample extracts falter, test a dilution to assess inhibition. Clinical laboratory validation guidance, including CLSI EP05, emphasizes evaluating precision across runs and days; one successful plate is not enough. A modest pilot can save time, though it cannot replace validation for your specific assay and intended use.
| Decision Dimension | What to Compare | Pilot-Reaction Plan | Quality Controls | How to Interpret the Results |
|---|---|---|---|---|
| Assay purpose | Choose a formulation intended for the assay: conventional endpoint PCR, high-fidelity amplification, or real-time quantitative PCR (qPCR). qPCR mixes must be compatible with the instrument’s detection chemistry. | Test candidate mixes using the same primer pair, template, reaction volume, and cycling program wherever the formulations allow. | Include a no-template control (NTC) for each mix. For qPCR, review amplification and melt curves when applicable. | Compare results only among mixes designed for the same application. A qPCR mix is not automatically suitable for endpoint PCR, or vice versa. |
| Polymerase type | Standard Taq is commonly used for routine amplification. Hot-start Taq can reduce nonspecific amplification during reaction setup. High-fidelity polymerases are appropriate when sequence accuracy is important. | Run each candidate with a known template and a representative target. For high-fidelity workflows, assess the amplified product by the method required for downstream use. | Use a positive amplification control with a template known to produce the target. Keep template input consistent across reactions. | Consider specificity, yield, required sequence accuracy, and downstream application together; the brightest band alone does not establish the best choice. |
| Premixed versus separate reagents | A premix may contain polymerase, buffer, magnesium, and dNTPs, reducing setup steps. A configurable system allows individual components to be adjusted when troubleshooting is needed. | Follow the mix’s recommended reaction recipe. If comparing formats, keep final reaction volume and template amount consistent and record any added components. | Prepare a master mix for replicate reactions where practical, and include an NTC to monitor contamination introduced during setup. | Choose the format that balances workflow consistency and the level of reaction optimization your assay requires. Do not add components already present in a premix unless the protocol calls for them. |
| Primer and target behavior | Targets with high GC content, long amplicons, or difficult secondary structure may need a formulation specifically validated for those conditions. | For an assay that is not yet optimized, test an annealing-temperature range using the primer supplier’s or assay’s recommended starting conditions. Change one variable at a time. | Use a positive control and inspect product size by an appropriate separation method for endpoint PCR. Include the NTC in every pilot run. | Prefer a condition that produces the expected product with minimal nonspecific products and repeatable results, rather than selecting on yield alone. |
| Replicates and reproducibility | Assess whether candidate mixes perform consistently across replicate reactions and, where relevant, across separate setup runs. | Run at least duplicate pilot reactions per candidate as an initial screen; use additional replicates for critical assays or borderline results. | Keep pipetting, template input, cycling conditions, and analysis method consistent. Document reagent lot, storage, and freeze-thaw history. | Investigate large differences between replicates before choosing a mix. Set assay-specific limits for acceptable variation before routine use. |
| Contamination monitoring | Consider the sample workflow and the risk of carryover contamination, especially for high-sensitivity assays. | Include an NTC in each pilot run. For workflows involving nucleic-acid extraction, include an extraction blank when appropriate. | The NTC should show no target-specific amplification or expected-size product. The extraction blank should also be negative for the target. | A positive contamination control invalidates interpretation of the affected run; identify the source and repeat the test with clean reagents and setup practices. |
| Acceptance criteria | Define what constitutes an acceptable result for the assay before reviewing pilot data. | Record target detection, product specificity, replicate agreement, and any assay-specific qPCR measures. | Confirm that the positive control performs as expected and that negative controls remain negative. | Select a mix only when controls pass and the candidate meets predefined assay requirements. Acceptance limits should be validated for the specific assay rather than treated as universal values. |
Practical selection rule: Choose the PCR mixture that meets the assay’s specificity, reproducibility, and downstream-use requirements while passing the appropriate positive and negative controls. Follow the formulation’s protocol, since component concentrations and cycling recommendations vary between products.
Visit the official SA government portal www.sacoronavirus.co.za to stay informed about latest COVID-19 updates. Dismiss